
How to Apply Knee Tape With Arthritic or Stiff Hands
Written by Brian Li, Co-Founder, Easy Kinesiology
Last updated: August 3, 2026
I co-founded Easy Kinesiology, so I sell the product this article mentions — that bias is disclosed up front. What follows is built on published physical-therapy guidance and on the verbatim reports of our own verified buyers, including the ones who found application genuinely hard.
The easiest way to apply knee tape with stiff or arthritic hands is to change the routine, not the tape job: sit down with everything in reach, use pre-cut strips so there's no scissors work, crack the paper backing at a fold instead of picking at a corner, and smooth the strip down with your palm — not your fingertips.
That one paragraph is the whole method. The rest of this page walks through it slowly, because almost nobody else does. Search for taping help with arthritic hands and every result shows you how to tape the hands themselves. Useful — but a different problem. If your knees are what need taping and your hands are what make it hard, the standard instructions quietly assume finger strength you may not have. This guide doesn't.
Why is kinesiology tape so hard to apply when your hands are stiff?
Kinesiology tape application leans on one specific ability: the pinch. You pinch scissors to cut strips off a roll. You pinch a paper corner to start the backing peel. You pinch both ends to control tension across the knee. And that move runs straight through the thumb — "50 percent of hand use — and 100 percent of gripping — requires a functioning thumb," according to A. Lee Osterman, MD, professor of hand and orthopedic surgery at Thomas Jefferson University [1]. CreakyJoints puts the consequence plainly: "Osteoarthritis of the thumb causes gripping and pinching to become very painful and can result in significant disability." [1]
So a task designed around pinching meets hands that pinch painfully or not at all. Three walls, in order:
- The cutting wall. Roll tape has to be measured, cut, and corner-rounded — TapeGeeks' guidance says to round every corner so the tape doesn't snag on clothing [4]. That's fine scissor work before you've taped anything.
- The peeling wall. The paper backing has to come off without your fingers touching the adhesive. Every brand's instructions describe some version of a fingernail-and-pinch move.
- The tension wall. The middle of the strip goes on with light stretch while both ends go down with none [3]. Controlling that through stiff fingers takes practice.
The good news: each wall has a workaround, and one of them can be removed from the list entirely.
What our verified reviewers told us
We know this problem is real because our own buyers describe it — and the most common complaint in our verified reviews isn't about comfort or staying power. It's about application. Verbatim:
"it is very difficult to get the backing off to apply. I am a senior… I end up with more clumped up tape before I can get it placed." — Beverly Hall, verified review
"hard to take off the backing from the tape." — Lisa Ito, verified review
"Must be applied perfectly or it twists." — Eleanor Damico, verified review
And one buyer who never got past the problem at all:
"this tape did not work for me… and the fact that it's hard to apply maybe the bigger issue." — Andrew Ricks Jr, verified review
We publish those because they're true, and because a page that pretends taping is effortless for every pair of hands would be no help to the reader those quotes describe. Kinesiology tape is a stretchy cotton strip on a fussy paper backing — a wonderful material with one genuinely annoying step. The routine below is what closes the gap for most people. Not for everyone. Andrew's review is proof of that, and it's why the tape carries a money-back guarantee instead of a promise.
How do you get the backing off without a strong pinch?
Crack the backing in the middle instead of picking at a corner. That's the core move. The paper backing on kinesiology tape splits when the strip is bent sharply — no fingernail needed, and every brand's tear-by-folding instructions rely on it. Brands describe this differently: KT Tape says to twist and pull so the paper tears about two inches from the end [3], TapeGeeks says to fold a couple of inches from one end and tear [4], and TheraBand's tip is to break the backing just by pulling the strip apart [5]. Three phrasings, one idea — the fold does the work your fingernails can't.
Done with stiff hands, it looks like this:
- Hold the strip flat between both palms — no pinching yet.
- Fold it sharply over one finger, backing side out, about a third of the way along. The paper cracks along the fold with a visible split.
- Open the fold. Now peel from the split with the flat pads of your fingers, pushing the paper away rather than plucking it. The paper lifts off in a sheet.
- Leave the last couple of inches of paper on. That covered end is your handle — you can grip it firmly without your fingers ever touching the adhesive, which the makers' own instructions warn against [5].
Practice the fold once on a strip you don't intend to use. It's a ten-second skill, and it removes the single step our reviewers complain about most.
A 9-step knee-taping routine for stiff hands
The steps below assume pre-cut strips. If you're working from a roll, someone with comfortable hands should do the cutting and corner-rounding in advance — batch a week's worth at once.
- Tape when your hands are at their best. For many people that's after a warm shower, which also leaves the skin clean and ready. Skin must be fully dry and lotion-free, or the adhesive won't hold [4].
- Sit down and stay down. Use a firm chair, knee bent to about 90 degrees. Standing and bending over the knee turns a hand problem into a hand-and-back problem.
- Lay everything out first. Strips, a towel, and anywhere you plan to set peeled backing — all within arm's reach before the first peel. Rushing mid-task is how tape ends up, in Beverly's words, clumped.
- Crack the backing at a fold, as above, and peel to your handle end.
- Place the bare end below the kneecap with zero stretch. Ends always go down unstretched — that's every brand's rule, not ours [3].
- Lay the strip along the muscle with a light stretch, or none. If tension control through stiff fingers is a fight, skip the stretch entirely. A flat, unstretched strip that's placed well beats a perfectly tensioned strip that twisted on the way down. As Hadiya Green Guerrero, PT, DPT, told CreakyJoints: "if you don't apply it perfectly, it usually can still help." [2]
- Peel the handle, lay the last end down unstretched.
- Smooth the whole strip with your palm for a slow count of 13. Rubbing is what sets the adhesive [5]. A flat palm does this better than fingertips ever could — this step favors stiff hands.
- Sit for a few minutes before walking far. Published guidance allows up to 30 to 45 minutes for the adhesive to reach full grip before activity [4] — you don't have to wait that long to stand up, but don't tape and immediately head down the stairs either.
The strip patterns themselves — where each strip goes for different knees — are demonstrated on camera in our video tutorials, and the step-by-step application guide covers placement in detail — and if the knee is arthritic, the gentler arthritis taping routine adapts those steps for thinner skin, while for front-of-knee kneecap pain the kneecap-taping guide shows a frame placement that works with straight pre-cut strips, no Y-cutting. This page is about getting the tape from box to skin; those cover where it lands.
What if your hands still can't manage it?
Then borrow hands, without a shred of guilt. CreakyJoints' guidance on taping is direct about this: "if you can't easily reach the area, you'll have to have someone else in your household be instructed." [2] The same applies when reach is fine but grip isn't. Taping a knee takes another person about two minutes, the routine above works exactly the same from the helper's side, and a strip lasts days — a spouse, neighbor, or visiting family member covers a week of support in one short favor. Our multi-day wear reports are collected in the wear-time guide.
An occupational or physical therapist is the step up from there. They can watch you apply tape — in person or over video — and adapt the technique to your hands specifically [2]. And if your hands are newly stiff, increasingly painful, or losing grip quickly, that's worth a medical visit in its own right, tape or no tape.
Does pre-cut tape actually make application easier?
Pre-cut tape removes the first wall — the scissors — completely, and that's not a small thing. CreakyJoints notes that kinesiology tape "is available over the counter and pre-cut, which also makes it easier to apply." [2] No measuring, no cutting, no corner-rounding, no snagged square edges. For stiff hands, that's the difference between a scissors-and-ruler project and a peel-and-place task. The full cost-and-convenience tradeoff between the two formats — including where the roll honestly wins — is weighed in our pre-cut vs. roll comparison.

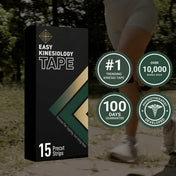
Full disclosure, again: what follows is about our own product, so weigh it accordingly. Easy Tape comes pre-cut in a patented diamond shape with the corners already rounded — the design was engineered for stiff fingers and limited reach, because buyers like the ones quoted above are who it's for. The backing still has to come off, and as this whole page admits, that step can still be fiddly on a bad hand day. The fold-crack method is our honest answer to it. Some buyers land on the easy side from day one:
"The tape was easy to apply and lasted three days on my knee. It was also easy to take off." — Diana Noad, verified review (Results may vary.)
"Easy to apply and stays on even thru showers!" — Anita Lungari, verified review (Results may vary.)
Verified buyers rate the tape 4.7 stars on average, and every order carries a 100-Day Money-Back Guarantee — if your hands and this tape don't get along, that's covered: see the tape here. If you're still comparing options, the seniors' guide and the arthritis-knee tape checklist both weigh application effort alongside everything else.
Quick answers
Can someone else apply my knee tape for me? Yes — and professional guidance encourages it [2]. The helper follows the same routine above; application takes about two minutes and one strip lasts days.
How long will the tape stay on once it's finally applied? Our verified reviewers most often report 2 to 3 days on a knee, through showers and sleep. The wear-time guide has the full picture, including why some applications fail early.
Will removing the tape hurt stiff hands too? Removal favors flat hands over pinching — press the skin down and pull the tape back slowly, ideally after a shower has softened the adhesive. The application guide walks through gentle removal step by step.
References
- CreakyJoints — "Arthritis and Grip Strength: How to Protect Your Hand Grip" (expert: A. Lee Osterman, MD, Thomas Jefferson University / Philadelphia Hand Center) — https://creakyjoints.org/living-with-arthritis/arthritis-hand-grip-strength/
- CreakyJoints — "Kinesiology Tape for Arthritis: Does It Help Treat Pain and Stiffness?" (expert: Hadiya Green Guerrero, PT, DPT, American Physical Therapy Association) — https://creakyjoints.org/living-with-arthritis/kinesiology-tape-arthritis/
- KT Tape — "How to Apply KT Tape | Kinesiology Taping Guide" — https://www.kttape.com/pages/how-to-apply-kt-tape
- TapeGeeks — "8 Tips for Applying Kinesiology Tape" — https://tapegeeks.com/blogs/news/8-tips-for-applying-kinesiology-tape-find-answers-to-commonly-asked-questions
- TheraBand Kinesiology Tape — "Helpful Tips" — https://www.therabandktape.com/videos/helpful-tips.html
Medical disclaimer
This content is for informational purposes only and is not medical advice. The information provided should not be used to diagnose or treat any health problem or disease. Always consult a qualified healthcare professional before changing your treatment plan or exercise routine. Individual results may vary. Easy Tape is not intended to diagnose, treat, cure, or prevent any disease.