
How to Apply Kinesiology Tape to Your Knee (Even With Stiff Hands)
Written by Brian Li, Co-Founder, Easy Kinesiology
Last updated: July 21, 2026
I co-founded Easy Kinesiology and work with PT. Cheng-Lin Sung, the physiotherapist who designed our pre-cut knee tape. I'm not a doctor — every physiological claim below is cited to a medical source, and where we recommend our own product, we say so out loud.
To apply kinesiology tape to a knee: clean and dry the skin, sit with the knee bent to about 90 degrees, press the first two inches of tape on with zero stretch, lay the middle of the strip over the sore area with light stretch, finish with a zero-stretch end, then rub the whole strip for ten seconds so the adhesive bonds.
That's the core method physical therapists teach, and this guide walks through it in full. But most taping guides assume an athlete with nimble fingers, a fresh roll of tape, and sharp scissors. If you're over 50 and your hands don't grip like they used to, the standard instructions lose you at the fiddly parts — cutting rounded corners, peeling backing paper. So this guide also teaches a pre-cut shortcut built for stiff hands.
What does kinesiology tape do for a knee?
Kinesiology tape is a stretchy cotton strip that recoils a little after you press it on, gently lifting the skin over the joint. Medical News Today describes the effect as a microscopic layer opening between the skin and the tissue underneath, which may ease pressure and support circulation around the knee [1].
The evidence is encouraging but modest. In research reviewed by Medical News Today, a 2017 trial of 42 people reported better pain relief and improved walking with kinesiology tape than with placebo tape, and a 2019 trial of 141 people found reduced pain and joint stiffness after three days of wear [1]. Tape helps some knees more than others.
Kinesiology tape dates to 1973, when a Japanese chiropractor named Dr. Kenzo Kase developed it [1]. Unlike a rigid brace, kinesiology tape supports the knee without squeezing it, and it moves when you bend. What tape won't do is fix an injury — a knee that's swollen, hot, or freshly hurt needs a professional before it needs tape.
What do you need before taping a knee?
- Kinesiology tape — a roll plus sharp scissors, or pre-cut strips
- Rubbing alcohol, or plain soap and water
- A towel — the skin has to be fully dry
- Scissors for rounding corners, if you're cutting from a roll
- About an hour of lead time before exercise or a long walk
Two skin notes before you start. Trim heavy hair with clippers rather than shaving — tape grips best on low-hair skin, but freshly shaved skin can sting on removal. And never tape over broken, irritated, or fragile skin; if a past application left a rash, let the skin recover completely first.
How do you apply kinesiology tape to a knee, step by step?
This is the standard kneecap-support method from Healthline's medically reviewed knee-taping guide [2], with adhesion details from KT Tape's application instructions [3]. Expect it to take about five minutes the first time and two once you've practiced.
- Clean the skin. Wipe the knee and lower thigh with rubbing alcohol, then dry completely. Lotion is the silent killer of tape adhesion — if you moisturized this morning, wash it off first [3].
- Cut two strips and round the corners. Measure from the bony bump below your kneecap (the tibial tubercle) up to the tendon above the knee, and cut two strips that length. Round every corner with scissors — square corners snag on clothing and start the peel [2].
- Sit with the knee bent. Sit on the edge of a chair with the knee at about 90 degrees. Taping a bent knee builds slack into the strip, so the tape stretches with the joint instead of tugging loose the first time you stand up.
- Anchor the first strip — zero stretch. Tear the backing paper about two inches from one end [3], and press that anchor down beside the bump below your kneecap. Anchors always go on with no stretch. A stretched anchor recoils and lifts within hours.
- Wrap the inner knee. Peel the backing as you go and wrap the strip around the inner edge of the kneecap at roughly 40 percent stretch [2], ending above the knee. Lay the last two inches down with no stretch at all.
- Mirror it on the outer knee. The second strip starts at the same anchor point and wraps the outer edge of the kneecap at the same tension, so the two strips frame the kneecap in an X [2].
- Optional third strip for under-kneecap soreness. Healthline adds a short strip below the kneecap, stretched firmly — up to 80 percent — through the middle only, with both ends laid down loose [2]. The firm stretch works there because the strip is short and its ends stay slack.
- Rub everything. Rub each strip briskly for about ten seconds. The adhesive is heat-activated, and friction is what bonds it [3].
- Test, then wait. Bend the knee a few times — the tape should stretch and recoil without pinching or pulling skin. Then give the adhesive about an hour before exercise or long walking; KT Tape recommends the same lead time [3].
How much stretch goes where, in one glance:
| Zone | Stretch | Why |
|---|---|---|
| First 2 inches (anchor) | None | Stretched ends recoil and peel |
| Mid-span around the kneecap | Light to moderate (25–50%) | Support without pulling skin |
| Short strip under the kneecap | Firm (up to 80%) | Short span only; ends stay loose |
| Last 2 inches | None | Same rule as the anchor |
Published numbers differ a little — Healthline uses 40 and 80 percent [2], KT Tape skips exact figures and warns against overstretching [3]. The safe rule for older skin: when in doubt, use less stretch. Under-stretched tape stays on and still supports the knee; over-stretched tape peels by dinner and can leave a red mark.
The pre-cut shortcut — full disclosure, this is our product
Fair warning before this section: Easy Kinesiology makes pre-cut tape, so we're not neutral here. We make it because the steps above — measuring, cutting, corner-rounding, backing-peeling — are exactly where older hands give up. (Still deciding between a roll and pre-cut strips in the first place? Our pre-cut vs. roll comparison weighs both formats honestly, the roll's wins included.)
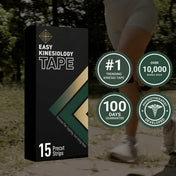
Easy Tape strips come pre-cut in a patented diamond shape. No measuring, no scissors, no corner-rounding. PT. Cheng-Lin Sung, a physiotherapist with 14 years of clinical practice, designed the shape so the diamond opening sits directly over the painful spot. Our own pitch for it: if you can stick on a band-aid, you can apply this.

The pre-cut application, condensed from our video tutorials:
- Find the sore spot first. Press around the knee with a finger until you land on the exact point that complains. The diamond center goes directly over that spot.
- Tear at the cut. The backing splits along the pre-cut line — fold the strip and it opens on its own, no fingernail-picking at a corner.
- Peel, stick, smooth. Peel the backing away, place the diamond over the sore spot with the knee bent, and smooth the strip down from the center outward.
- Test by bending. Bend the knee and check that the tape stretches with it.
- Add a second strip perpendicular to the first when the knee needs extra stability — crossed strips support the joint from two directions.
Those five steps condense the method from our video tutorials page, where 9 knee-specific applications are demonstrated on camera — general instability, kneecap pain, post-surgery aches, IT band, and more: watch them here. If you're still weighing whether taping is worth trying in the first place, the complete guide to kinesiology tape for knee pain covers the evidence and how to choose a tape before you commit.

Why won't your kinesiology tape stick — and how do you fix it?
None of the guides ranking for this topic has a real troubleshooting section, so we built one from our own data: the most common application complaints across our verified reviews (4.7-star average), quoted verbatim — a taping guide that pretends tape never fails isn't much of a guide. One customer, Andrew Ricks Jr, put it plainly: "this tape did not work for me… and the fact that it's hard to apply maybe the bigger issue." Here's what goes wrong, and what fixes it.

Complaint 1: the backing won't come off. "it is very difficult to get the backing off to apply. I am a senior… I end up with more clumped up tape before I can get it placed." — Beverly Hall, verified review.
The fix: stop picking at corners with a fingernail. On roll tape, tear the paper backing crosswise a couple of inches from one end — or fold the strip so the paper splits across the middle — then use the paper as handles; KT Tape's own instructions teach the two-inch tear for this exact reason [3]. On our pre-cut strips, fold at the diamond cut and the backing opens itself. Either way, peel a few inches at a time and keep the rest of the paper on as a handle, so the adhesive never touches your fingers.
Complaint 2: the ends roll up within hours. "Tape does not stick to the skin well at all. Within 30 mins the ends start to roll up." — Teffney Shearer, verified review. And: "within an hour under my slacks they have rolled up in a ball" — Kathy Harvey, verified review.
Rolling ends have four usual causes, in order of likelihood: lotion or oil still on the skin, stretched anchors, square corners, and a skipped ten-second rub. Fix all four and most rolling stops. If an end still lifts mid-wear, trim the lifted piece off with scissors instead of pressing it back down — peeled adhesive picks up lint and won't re-bond. A strip that has rolled into a ball is done; replace it.
Complaint 3: the tape twists as you place it. "Must be applied perfectly or it twists." — Eleanor Damico, verified review.
Twisting happens when the whole strip gets peeled naked before placing — bare elastic tape behaves like flypaper. Keep the backing on and peel it away in stages as you lay the strip down, and bend the knee before you start so the tape isn't fighting the joint while you position it. If your grip is weak or your hands shake, skip the roll entirely — the pre-cut method above exists for exactly this problem.
Common questions about taping a knee
How long does kinesiology tape stay on a knee?
Plan on 2 to 3 days of real-world wear. That's what our reviewers most often report: "The tape was easy to apply and lasted three days on my knee. It was also easy to take off." — Diana Noad, verified review (Results may vary.) And: "Lasts two days through all movement and is the best I have found." — Laurie Juskiewicz, verified review (Results may vary.) Our brand rating is up to 7 days under good conditions — treat that as a ceiling, not a promise.
Published wear times disagree because tape types differ. Healthline lists 3 to 5 days for elastic kinesiology tape but about 18 hours for rigid McConnell-style tape [2], while KT Tape frames wear as up to 48 hours around exercise [3]. A practical rule: replace the strip when the ends lift or the recoil feels dead, and give the skin a rest day if it looks pink underneath. The full wear-time breakdown — published ranges against real wear reports, and the fixes that extend wear — is in how long does kinesiology tape stay on.
Can you shower with kinesiology tape on?
Yes. Kinesiology tape is built to ride through showers, sweat, and sleep — pat it dry with a towel afterward instead of rubbing it. One of our reviewers, Anita Lungari: "Easy to apply and stays on even thru showers!" (Results may vary.) Skip long soaks in baths and hot tubs when you can; soaking softens adhesive faster than a shower does.

How do you remove kinesiology tape without hurting your skin?
Remove kinesiology tape slowly and low, folded back against itself — never rip it off like a bandage. KT Tape's guidance boils down to two hands: hold the skin down with one while the other peels the tape back slowly [3]. Three extra tricks for thinner, older skin: remove after a warm shower while the adhesive is soft; rub baby oil or olive oil into the tape and wait ten minutes [3]; and peel in the direction of hair growth. If a corner won't budge, add more oil rather than more force.
When should you not tape a knee?
As a general safety precaution, skip the tape and see a professional when any of these is true: the skin is broken, irritated, or fragile; the knee is swollen, hot, or newly injured; you have gout or acute joint inflammation; or a past application caused a rash that hasn't fully healed. On the skin rules, Medical News Today is explicit: do not apply kinesiology tape to damaged or irritated skin — that covers rashes, cuts, and sunburn [1]. The swelling and gout items are our own caution, not a cited clinical claim — get those looked at instead of taping over them. Kinesiology tape supports a working knee — it's a support, never a substitute for diagnosis or care. Taping the wrong knee problem delays the right help.
Where should you go from here?
If your knee needs a more specific pattern than the general wrap above, the video tutorials page shows all 9 knee applications demonstrated on camera. If the pain sits at the front of the knee — kneecap pain on stairs or after long sitting — the kneecap-taping guide covers the two taping systems and the frame placement built for it. If the stairs symptom is a click or pop rather than plain pain, the clicking-knee guide sorts out whether that knee even needs tape first. If arthritis is the reason you're taping, we put the whole buying decision into a 5-point checklist: the best kinesiology tape for arthritis knees — and the arthritis-specific taping routine adapts the steps above for older skin and stiffer hands. And if you're doing this for a parent — or your own hands make fine work hard — the seniors guide covers what to look for and what goes wrong most often.
And if the roll-and-scissors routine is the one thing standing between you and a taped knee, that's the exact problem Easy Tape was designed around — pre-cut diamond strips, latex-free adhesive, a 4.7-star average from verified buyers, and a 100-Day Money-Back Guarantee: see the tape here.
References
- Medical News Today — "How to use kinesiology tape: Research, uses, and tips" — https://www.medicalnewstoday.com/articles/kt-tape-knee-arthritis
- Healthline — "How to Tape a Knee: Techniques for Pain, Stability, and Support" (medically reviewed by Angela M. Bell, MD, FACP) — https://www.healthline.com/health/how-to-tape-a-knee
- KT Tape — "How to Apply KT Tape" — https://www.kttape.com/pages/how-to-apply-kt-tape
Medical disclaimer
This content is for informational purposes only and is not medical advice. The information provided should not be used to diagnose or treat any health problem or disease. Always consult a qualified healthcare professional before changing your treatment plan or exercise routine — and before taping at all if you have gout, acute joint inflammation, or a new injury. Individual results may vary. Easy Tape is not intended to diagnose, treat, cure, or prevent any disease.